
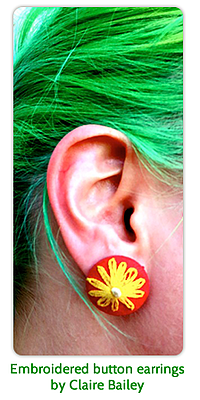
 My Friend Claire showed me this technique the other day and I thought it was a great one to share. In an hour or less, you can make bright spring earrings from small fabric scraps. You can match them to your outfit (a great idea for the wedding season), or use them for an added splash of neon. Make them for yourself or your friends – these can make great gifts!
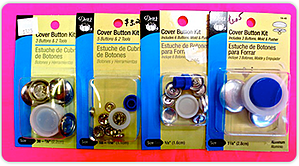
 Here’s what you’ll need:
-Packages of cover button kits (they come in various sizes and you can get them from your friendly fabric store for around $3.50). The larger buttons are a little easier to manage, but it’s worth trying different sizes to see what you like.
-Small fabric scraps from Goodwill (from skirts, shirts, scrap fabric, scarves, any lightweight cotton or silk will do).
-Earring backs and epoxy (from a craft store).
-Embroidery thread and needle (optional).
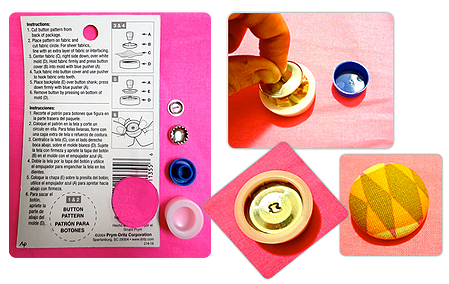
 First open up your button kit package. Cut out the template circle on the back, and use it to trace and cut circles from your fabric. Follow the instructions and place the top button piece on top of your fabric and insert it into the white rubber mold. Tamp down the fabric so it stays inside the button and then place the metal backing on top. Use the blue tool to clamp the backing in place. Then remove your newly covered button!
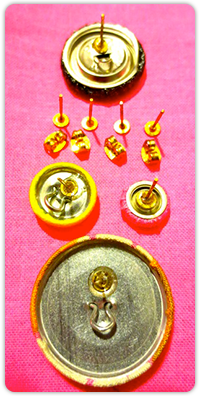
Once removed, use your fingers or pliers to bend down the hook on the back (some styles make it easy for you to remove this hook before covering the button, this will lead to a cleaner looking earring). Finally mix up your epoxy and apply a small amount to the earing back and place it slightly above center. Once the epoxy has hardened you have a new pair of earrings! Make lots and share with your friends, and make sure to check out new spring dresses and styles at Goodwill. You never know what you’ll find!


