
 This week brighten up dark corners of your house before the gloomy weather sets in. If you have Christmas lights stored away or if you find a good strand at Goodwill, you can turn them into a wall light in about an hour. You will also need a few simple materials that you can find for great prices at Goodwill.
You will need
- A box, cardboard letters, or any other non-flammable shape you can fill (you might find cardboard letters at Goodwill that you can turn into a custom light box sign!)
- String lights
- Duct tape
- Wire
- Lightweight cotton fabric in fun patterns or colors from Goodwill
- Colored paper
- Glue
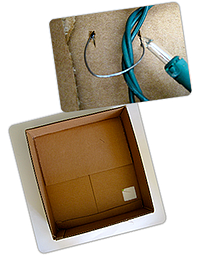 First cut a hole in the back of your box. Place your string lights inside and run the plug through the hole you just cut. Use wire to secure the light strands in place, so they won’t fall out when you mount them (twist the wire ends together on the back side of the box and leave a little extra wire at the top so that you can hang it later)
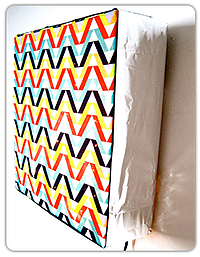
Use duct tape to secure your fabric to the side of your box. Tape opposite sides so that you can stretch the fabric evenly. Then tape down the corners.
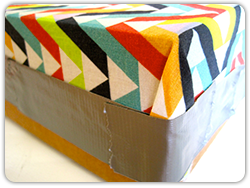 Next cut strips of paper (I used metallic wrapping paper that I found at Goodwill) to cover the edges of your new light. Tape the paper at one end, wrap the rest of the paper around the edges and use glue to make a nice end seam to cover up the tape you used at the beginning.
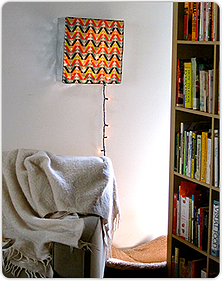
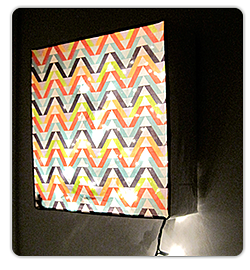 After drying, you can install your light! Use two nails or hooks and make loops with the extra wire on the back of the box, to hang over the nails. Plug in and test out your new light. Be careful not to leave this light unattended! Make several to have as wall decorations or for use for theme parties.


