
By Jessica Schoner - Interactive Media Coordinator, Goodwill Industries of Southeastern Wisconsin & Metropolitan Chicago
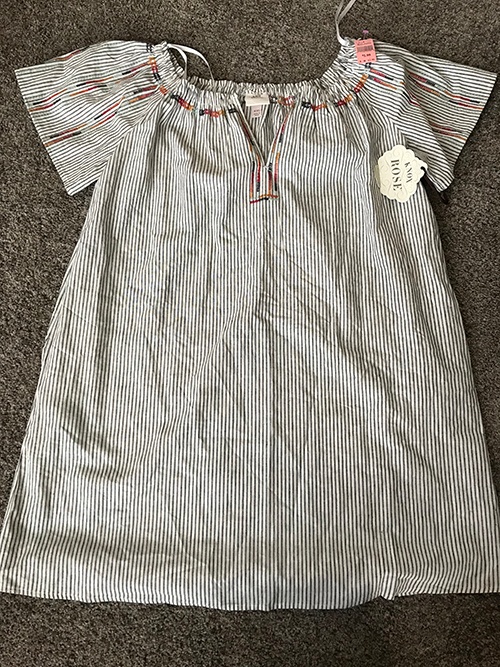
I’ve said it before (you know this if you’ve read my past blogs) and I’ll say it again… sewing is not my friend. It’s just not something that I enjoy. Maybe because I don’t really know how to do it. Who’s with me on this one?! That being said, when I spotted this dress at Goodwill there were just too many things I loved about it to not take the opportunity to upcycle it. The texture, that embroidery... I mean, come on! So, I faced my fear and with a little help from my patient mother (thanks Mama!), I was able to make four unique items from this one dress. Hopefully this project can serve as a little inspiration to any of you out there who aren’t too keen on pulling out the sewing machine. You can do it!Take a look…
Item One: Satchel/Bag
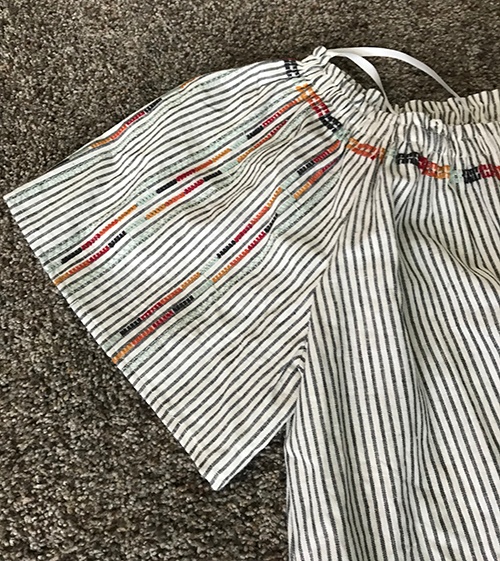
When I saw the cute sleeves on this dress with the elastic detailing on the neckline, the first item that came to mind was a small bag. This one was pretty darn easy, too!
I removed the sleeve from the dress using a seam-ripper. When I got to the part with the elastic, I carefully trimmed it off, ensuring the elastic stayed on either end by placing safety pins in the fabric. After turning the fabric inside out, I sewed the open ends together. The elastic top lost a tiny bit of its stretch, but it still fully functioned! I kept the hanger strap (is that what those are called?) attached, because it worked as a perfect handle! Look how cute this turned out!
.jpg?width=500&height=623&name=Item%201%20-%20Bag%20(2).jpg)
.jpg?width=500&height=667&name=Item%201%20-%20Bag%20(3).jpg)
.jpg?width=500&height=667&name=Item%201%20-%20Bag%20(4).jpg)
.jpg?width=500&height=571&name=Item%201%20-%20Bag%20(5).jpg)
.jpg?width=500&height=667&name=Item%201%20-%20Bag%20(6).jpg)
.jpg?width=500&height=609&name=Item%201%20-%20Bag%20(7).jpg)
.jpg?width=500&height=667&name=Item%201%20-%20Bag%20FINAL%20PRODUCT%20(8).jpg)
Item Two: Pillow
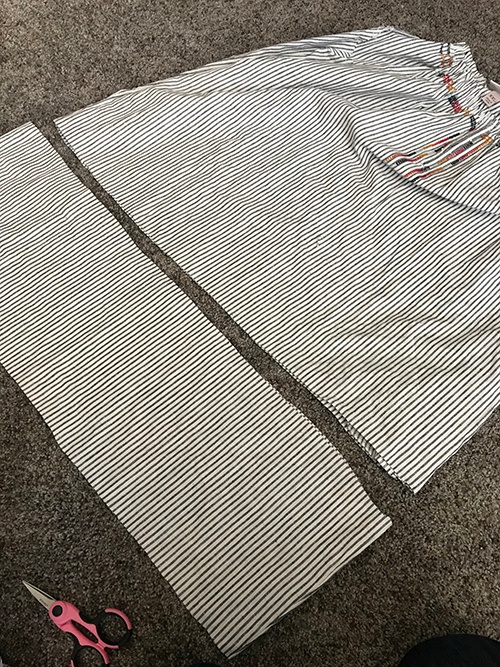
I scored this dress in a larger size, so I had a decent amount of material to work with at the bottom. The simple striped, textured pattern looked like it could make for the perfect accent pillow… and it did!
I started by cutting a long regular shape out of the bottom of the dress. By cutting straight across the entire dress, I was able to utilize the two side already being sewn (yay for less sewing on my end!). I flipped each piece backward, and sewed the two halves together, leaving about six inches of space to flip the sides to be outward facing, and to stuff it. I stuffed the pillow to the fullness of my liking and sewed it shut. Voila!
.jpg?width=500&height=667&name=Item%202%20-%20Pillow%20(5).jpg)
.jpg?width=500&height=667&name=Item%202%20-%20Pillow%20(2).jpg)
.jpg?width=500&height=636&name=Item%202%20-%20Pillow%20(3).jpg)
Item Three: Bookmark
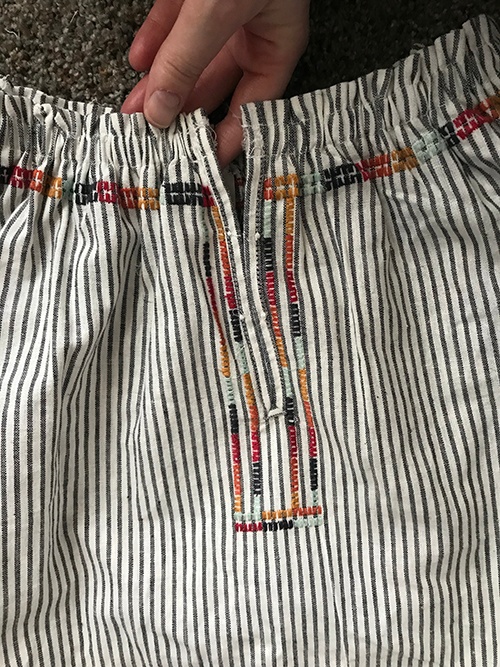
The neckline of this dress had really pretty detailing using hook closures. I wanted to keep this shape intact while still showing off the unique embroidery. After a little brainstorming, a bookmark came to mind! I cut out the shape of my bookmark, deciding to forego working with the elastic this time. I then matched that piece up to another spot on the dress and cut out a matching shape. I sewed three sides together, leaving the top open. Using the cardboard from a paper tablet, I cut out a piece to match the bookmark, and slipped it through the top. How cute is this?!
.jpg?width=500&height=667&name=Item%203%20-%20Bookmark%20(2).jpg)
.jpg?width=500&height=667&name=Item%203%20-%20Bookmark%20(3).jpg)
.jpg?width=500&height=754&name=Item%203%20-%20Bookmark%20(4).jpg)
.jpg?width=500&height=667&name=Item%203%20-%20Bookmark%20(6).jpg)
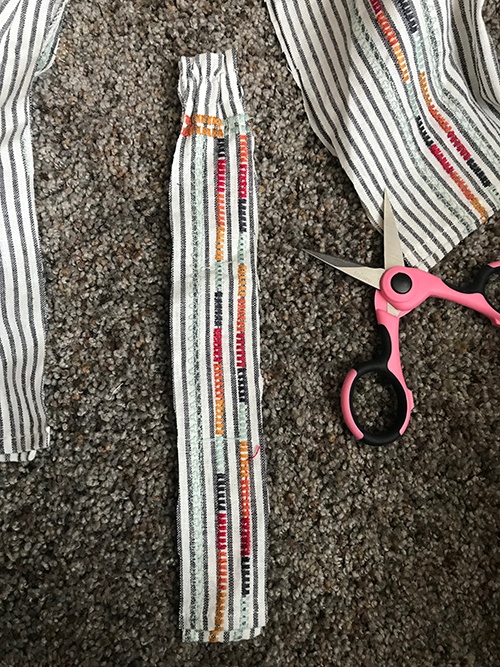
Item Four: Teether Clip
My little guy is nine months old now, and his teeth are really starting to pop through. Long story short, items to gnaw on are front-of-mind right now! He loves his teething egg, but I haven’t been too keen on the fabric clip that came with it. I thought this dress could add a funky look to it!
After removing the metal clip and the teething egg from my original teething piece, I cut out a strip of fabric that highlighted the stripes and the embroidery. To secure the pieces, I slipped the metal clip through the fabric, folded the fabric over and sewed it shut. I repeated that step for the string on the egg portion, double-checked that all pieces were secured safely and that’s it. I love unique this teether is now!
.jpg?width=500&height=667&name=Item%204%20-%20Teether%20Clip%20(4).jpg)
.jpg?width=500&height=754&name=Item%204%20-%20Teether%20Clip%20(2).jpg)


