
By Pam Pierson, Multimedia Manager, Goodwill Industries of Southeastern Wisconsin & Metropolitan Chicago

One of the best things I love about Christmas is seeing the reactions of my friends and family when they open gifts! It’s so fun to see their smiling faces. But, even more exciting is seeing their reactions to a homemade gift.
These easy DIY Christmas ornaments are great projects you or your kids can create in just a few hours. Plus, you can really personalize these one-of-a-kind ornaments for loved ones based on hobbies, sports, occupation, animals, favorite colors, etc.—the possibilities are endless!
Design #1 Supplies:
2-part clear/acrylic ball ornament
Colored ribbon
Decorative string (gold or silver)
Tinsel
Napkin (special/favorite design)
Mod Podge
Glue (dries clear)
Glitter
Paint brush
Scissors
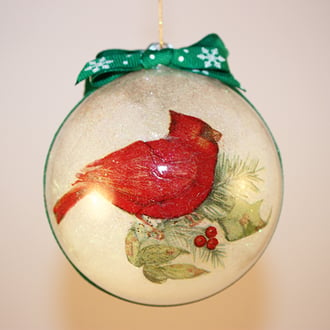
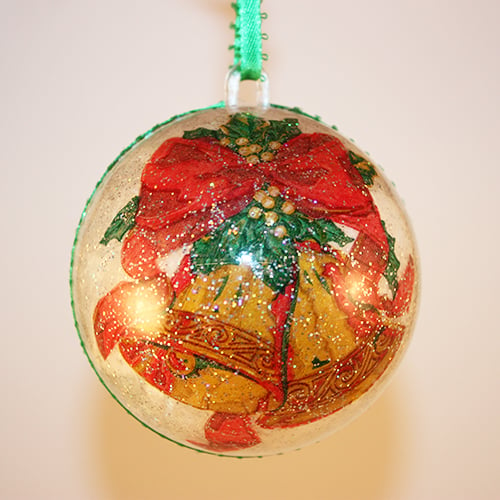
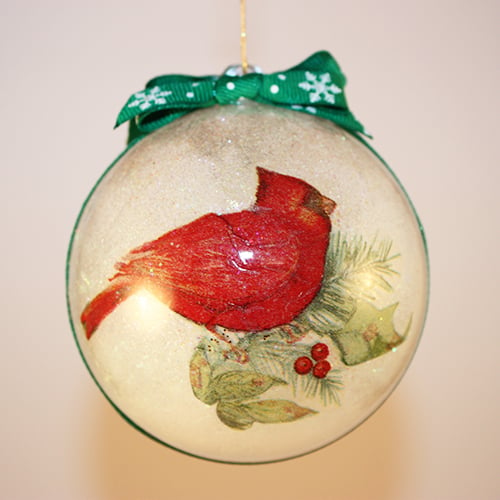
Design #1
- Carefully tear out your napkin design.
- Place design into the inside of one half of the ball ornament. Make sure the design is facing out. Lightly brush Mod Podge over the design.
- Repeat steps for the second half of the ball ornament.
- With the remainder of the napkin, tear small pieces (enough to cover the ornament).
- Place small pieces of napkin inside each half. Lightly brush Mod Podge over the small pieces to secure in place. If desired, add glitter with Mod Podge.
- Let Mod Podge dry.
- Fill ball ornament with tinsel and then affix two halves together (glue halves together to make more secure).
- Cut one (1) strip of ribbon to fit around the ornament (this will cover the middle part where the two halves come together).
- Cut another strip(s) of ribbon and tie one or two bows.
- Glue first strip of ribbon around the ornament.
- Glue bow(s) to top of ornament.
- Allow to dry.
- Measure decorative string. Affix string to top of ornament so ornament can hang freely from tree branch.
Design #2 Supplies:
2-part clear/acrylic ball ornament
Decorative string (gold or silver)
Potpourri
Glitter
Glue (dries clear)
Paint brush
Scissors
Drill
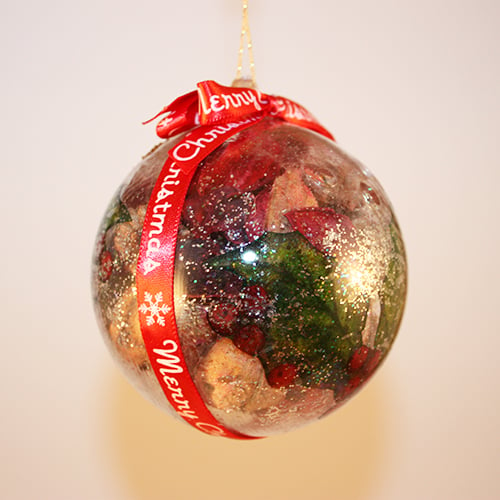
Design #2
- Carefully drill three (3) holes at the top of each half of the ball ornament (this will allow the scent to come through).
- If desired, dip brush into glue and then dab in the glitter. Paint glitter on inside of ball ornament. Let dry.
- Place potpourri inside one half of the ball ornament.
- Place potpourri inside the second half of the ball ornament.
- Affix two halves together (glue halves together to make more secure).
- Cut one (1) strip of ribbon to fit around the ornament (this will cover the middle part where the two halves come together).
- Cut another strip(s) of ribbon and tie one or two bows.
- Glue first strip of ribbon around the ornament.
- Glue bow(s) to top of ornament.
- Allow to dry.
- Measure decorative string. Affix string to top of ornament so ornament can hang freely from tree branch.


