
 I found a vinyl banner at Goodwill last week and remembered some of the cool, used billboard bags I’ve seen before. With
 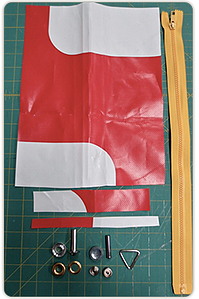 a new school year right around the corner, I thought it would be fun to make a pencil case out of the vinyl sign. To make your own pencil case, here’s what you’ll need:
-Sign, vinyl banner, fabric, or patterned clothing from Goodwill
-Zipper (taken from a Goodwill garment or purchased at a fabric store)
-Optional: grommets, snaps, or D-rings
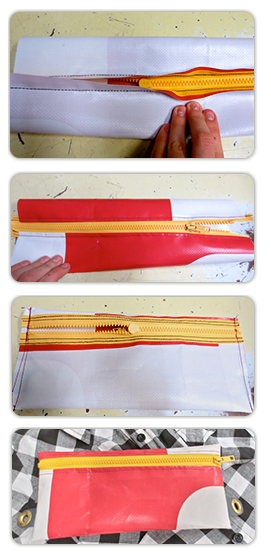 First cut your fabric into a nice skinny rectangle (I don’t like to give dimensions, because it’s more practical for you to adjust the size to meet your needs. Just be sure to add one inch to your desired final dimensions to allow for seams). Lay one side of your zipper against one edge of the rectangle and stitch in place (with right sides together). Repeat on the opposite side, making sure the zipper teeth are even.
Next flip over and top stitch the zipper down.
Flip inside out. Now you can add a wrist strap, a D-ring, or grommets (good for putting inside a 3-ring binder). You can find grommets and industrial snaps at a sewing store, and they come with instructions for how best to use them. Follow these instructions and use the tool provided to professionally install your hardware. Place your straps, buckles or whatever other attachments you wish to include on the inside of the bag (so they will be on the outside when you flip it right-side-out). Next stitch along both sides, making sure to reinforce the corners by sewing over them a few times.
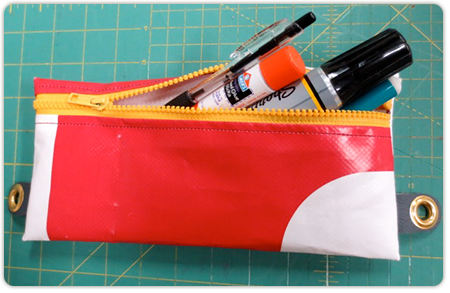
Trim off extra fabric at the corners and flip right-side-out. Fill with pens, rulers, glue sticks, and scissors and you’re ready for the new school year.
Shop Goodwill for your back-to-school needs! From clothing and shoes, to binders and backpacks, Goodwill has a lot to choose from with great prices and a community focus.


