
 Despite often overflowing closets, I have found that many American’s are not good about, or simply do not know how to properly care for their garments. By contrast in Ghana, many of the people I stayed with only had a hand full of outfits, but the ones they had, they kept in immaculate condition for years. My host in Ghana would even iron her t-shirts. I thought this was ridiculous at first; it’s just a t-shirt! But clean, pressed clothing really does make all the difference. You will feel better, look more put together, and feel more confident just by taking a little extra time to iron the clothing you find at Goodwill.
(Not to mention that with graduation and wedding season coming up, it’s even more important for you to look your best, and when it only takes about 3 minutes to iron a shirt, you really have no excuse not to.)
 Tools:
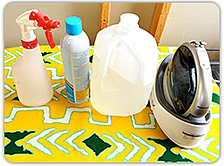
-You will want a good, heavy iron that makes good steam. (I use distilled water in my iron because we have hard water- this will ensure that your iron will stay clean, and won’t stain your clothes as it gets clogged with mineral deposits)
-A spray bottle or a wet towel
-An ironing board, a wider one will make your job quicker, and having a good ironing pad will make your clothing look much better too. (Goodwill often has great ironing boards, so be on the look out for them)
- If you want a more formal look, spray starch
Preparation:
Spray down whatever you want to iron, or wrap the clothing in a damp towel prior to ironing. This will relax the fibers and make your ironing much quicker and easier.
Technique.
I get the most complaints about ironing button down shirts so I will show you that technique. Other clothing will have similar steps.
I like to get the sleeves out of the way first.
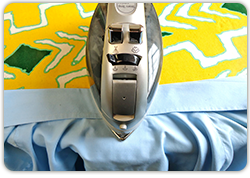
 1. Unbutton the cuff and iron (with the heat set to your shirt’s fabric type) by pressing on the wider end of the iron to avoid getting little wrinkles that can be harder to get out later.
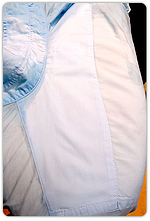
2. Lay out the sleeve and try to get it as flat as possible so that you won’t have to iron both sides. If you don’t like having a crease in the top of the sleeve, iron just up to, but not over the edge of the sleeve to give it a softer crease. Make sure to iron over the shoulder seam, giving it a gentle pull avoid ironing over any folds.
3. Next do the back of the shirt. Lay the collar out flat and iron. Pull slightly at the back seam as you iron it to get a nice crisp line.
 4. Now iron the front, going between buttons, and making sure not to miss the bottom edge.
5. I also like to iron down the collar, but only iron it in the middle back, so that it will roll over, and have a more graceful fold in the front.
 The whole process shouldn’t take more that three minutes, once you’ve practiced a few times, and you will be amazed what a difference it will make in the look of your clothing (and it is much cheaper and faster than dry cleaning). So don’t overlook some of the more wrinkly items at Goodwill, with a few minutes you can restore those clothes back to their intended glory (plus you will likely find a great shirt that everyone else walked past!).


