 Sometimes I see white pants, button downs, skirts and dresses at Goodwill and think they have a great shape, but need some color or a splash of something. If you feel similarly, this is the week to stock up on white clothes at Goodwill because I’ll show you how to use magazine pages to transfer images onto those plain clothes. You can get awesome results with just a few tools, and make those whites more graphic and fun. (It’s a great way to use those old magazines, too!)
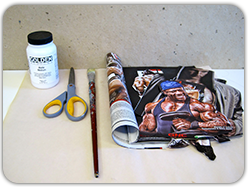 You will need:
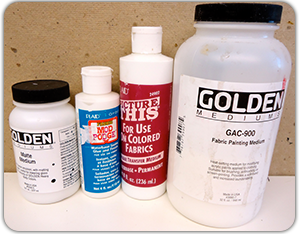
- Acrylic medium (matte or glossy if you like the shine) or photo transfer medium (acrylic mediums can be found in any craft store in the painting section)** see note
- Magazine or laser jet printed pages
- Scissors
- Paintbrush
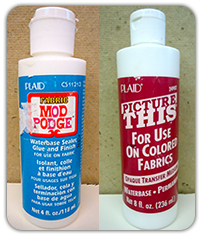
- White clothing from Goodwill that doesn’t stretch (if you use Picture This®, you can print on colored fabric too, and Mod Podge® does pretty well with stretch fabrics)
 |
 |
If you want to print on stretchy fabrics (like t-shirts) try Mod Podge® for fabric or photo transfer medium. I used matte medium for this project and found that it did fine with simple, woven cottons, but cracked and peeled off of stretch fabrics.
While you’re at Goodwill, make sure to buy an extra shirt or bed sheet to use as a test piece so you will know what to expect when you start on your final garment (Sometimes these test pieces end up looking even cooler than the final piece).
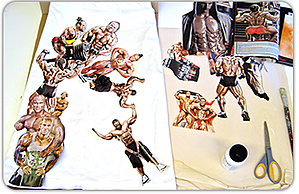
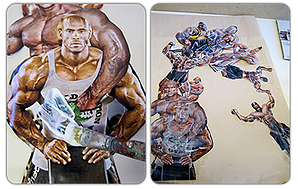
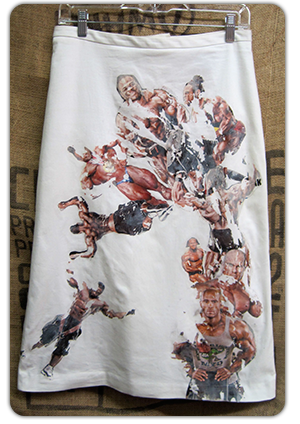
When you are ready to get started, cut out your images or print them on a laser jet printer (ink jet prints will bleed and run). I decided to use bodybuilding magazines.
Lay out your design but remember the images will be reversed, so make sure to photocopy text or use image editing software to reverse everything before printing.
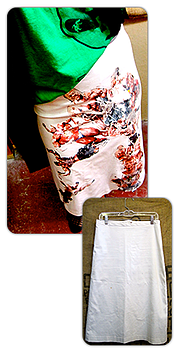
Next apply a layer of acrylic medium to the image. (Lay it on a little thick; this will help the image hold up better later.)
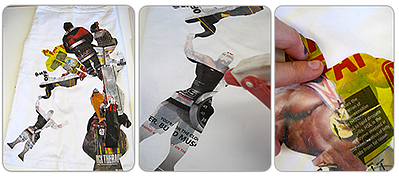 At this point you could choose to be done, but it’s a good idea to apply a thin coat of medium after you have removed the paper, and let it dry. This will make the images more durable (*this step does not apply if you use Picture This® or Mod Podge®). It’s also probably a good idea to hand wash these clothes (others have said they are washable, but I haven’t tried it yet).
You can try layering images, or combining them with fabric dyes, paints, or stencils to get more dramatic, wild looking clothing. The sky is the limit, explore away.
A Note About Mediums
|
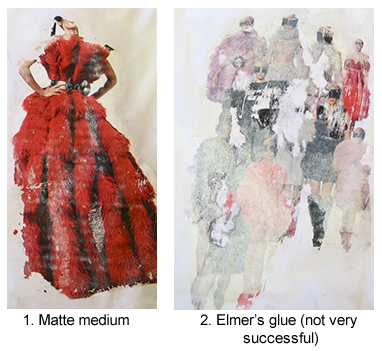
I experimented with different image transfer mediums to see which worked best. I tried:
and
|
 |
The Good
|
 |
|
The Bad Elmer’s® glue is terrible because it is always water soluble, so when you wet the paper, the image dissolves with it (though I knew this, I thought it might work anyway). ~$2 Fabric painting medium wouldn’t dissolve the ink, so no image was left (didn’t work at all). Though when mixed with matte medium, it did produce an image that was better on stretch fabrics than the matte medium alone. ~$7 I also had no luck with mineral spirits, I couldn’t get the image to transfer at all, plus the vapors are harmful to breath. ~$6 |
 |
|
Conclusion Use Picture This®, Mod Podge®, or Acrylic Medium and you’ll get better results. |
 |


