
 It’s that time of year again, graduation ceremonies, parties and celebrations. When planning a party for your special grad, don’t forget to set up a spot for gifts. To keep track of cards, make a DIY “mortar board” box.
For this project you will need:
- Round gift box with lid
- Foam core board
- Black craft for wrapping paper
- Skein of embroidery floss
 Cut a piece of black paper to fit around the box, allowing two extra inches. Tape or glue the paper to the box.
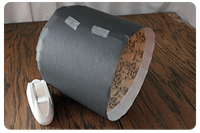
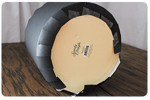 Clip the extra paper in one inch intervals at the top and bottom of the box. Fold the cut pieces in and tape to hold in place. Cover the edge of the lid with the same technique.
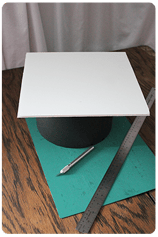
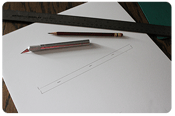
Cut a square from the foam core one-and-a-half inch bigger than the box. Use an X-Acto knife, cutting board and straight edge rule.
 Cut a half-inch wide slot through the center for the cards.
 Cover the foam core with black paper just like you would wrap a package. Cut open the slot and fold the paper in and tape to hold in place. Glue the “mortar board” to the lid.
- To make a tassel, open one end of the skein of embroidery floss. Wrap a piece of floss through the end and tie.
- Wrap and tie a second piece of floss a half inch from the top. This will create a loop.
- Cut the bottom pieces of floss to separate the strands, creating a tassel.
Tape the tassel to the mortar board lid.
Congratulations 2015 grads!


